How to Create Instagram-Worthy Photos Using Lightroom Presets – Image Tips
Published: 12/Jan/2025
In the world of social media, especially Instagram, the visual appeal of your photos can make a big difference in gaining followers and engagement. If you want to stand out and make your feed look cohesive and stunning, learning how to create Instagram-worthy photos is a must. One of the easiest and most effective ways to achieve this is by using Lightroom presets. These presets can transform your photos in just a few clicks, giving them a professional touch without needing advanced editing skills.
In this post, we’ll explore how you can create Instagram-worthy photos using Lightroom presets, how they work, and some tips to make the most out of them. By the end of this article, you’ll be ready to elevate your Instagram game and make your feed look amazing.

What Are Lightroom Presets?
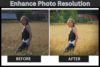
Before we dive into how to use them, let’s start with the basics. Lightroom presets are pre-made settings that adjust your photos’ color, exposure, tone, and other elements. Instead of manually adjusting each setting for every photo, you can apply a preset to instantly transform your images. Lightroom presets save time and ensure your photos have a consistent look.
Think of a preset as a style or filter that you can apply to your photos. Whether you want a bright, airy vibe, a moody and dark feel, or a vintage look, there’s a preset for every style.
Why Use Lightroom Presets?
The main reason to use Lightroom presets is to create Instagram-worthy photos quickly and easily. Here are some reasons why they are so popular among photographers and social media influencers:
- Time-Saving: Editing photos can take a lot of time. With Lightroom presets, you can save hours by applying ready-made edits.
- Consistency: If you want your Instagram feed to look cohesive, presets can help you achieve that. They allow you to apply the same style to every photo, creating a uniform aesthetic.
- Professional Quality: Lightroom presets are designed by experts, so they can give your photos a polished, professional look without needing to be a photo editing expert yourself.
- Customizable: While presets give you a starting point, you can always tweak them to better suit your photo.
Step-by-Step Guide to Creating Instagram-Worthy Photos Using Lightroom Presets
Now that you understand what Lightroom presets are and why they’re so useful, let’s walk through the steps to create Instagram-worthy photos using them.
Step 1: Install Lightroom
First, you need Adobe Lightroom. You can download it on your computer or phone, depending on your preference. Lightroom is available as a mobile app (free with in-app purchases) and as a desktop version, which requires a subscription to Adobe Creative Cloud.
Once you’ve installed Lightroom, you’re ready to get started with your presets.
Step 2: Choose the Right Lightroom Preset
Not all presets are created equal, so it’s important to pick one that fits the vibe you want for your photos. Whether you want something light and airy or bold and dramatic, there are presets for every aesthetic. You can find a variety of free and paid presets online.
When selecting your preset, consider your Instagram feed’s overall look. Do you want warm, sunset tones, or cooler, blue tones? Make sure the preset matches the mood you want to convey.
Step 3: Apply the Preset to Your Photo
Once you’ve chosen your preset, it’s time to apply it to your photo. Follow these steps in Lightroom:
- Open the photo you want to edit.
- Go to the “Develop” module (on the desktop version) or tap the “Presets” tab (on mobile).
- Choose your preset from the available options.
- Lightroom will automatically apply the preset settings to your photo.
It’s as simple as that!
Step 4: Fine-Tune the Photo
Although presets make editing easier, you may still need to make minor adjustments to suit your image better. Here are some areas to focus on:
- Exposure: If the image is too dark or bright, adjust the exposure to get the perfect balance.
- Contrast: Increase or decrease contrast to make your photo pop.
- Saturation: Boost or tone down the colors to make them more vibrant or muted.
- Sharpness: Add some sharpening if the photo looks too soft or blurry.
These small tweaks will ensure the photo looks just right.
Step 5: Export and Share Your Photo
Once you’ve finished editing, it’s time to export your image. Save your photo in the highest quality possible and then upload it to your Instagram account.
Remember, you can always go back to the photo and make further changes if needed. Lightroom allows you to re-edit the image as much as you want.
Tips for Creating a Cohesive Instagram Feed with Lightroom Presets
If you want to create Instagram-worthy photos that not only look great individually but also work well together on your feed, here are some helpful tips:
1. Stick to a Consistent Style
Choose a preset that fits the overall aesthetic you want for your Instagram feed. This will ensure that all of your photos have a similar look, creating a cohesive feed. If you want a light, bright vibe, stick with presets that enhance whites and pastels. If you prefer a moody, darker vibe, opt for presets that boost shadows and create deep contrasts.
2. Use Similar Lighting
When you’re shooting your photos, try to maintain similar lighting across your images. If you often shoot in natural light, try to keep that consistent, or if you use artificial lighting, make sure your setup stays the same. This will help your presets perform better and make your photos look even more Instagram-worthy.
3. Keep a Balanced Layout
When posting to Instagram, consider the layout of your feed. Mixing close-up shots with wide-angle photos can create a nice balance. Make sure the colors and tones of each photo work well together when placed next to each other on your grid.
4. Experiment with Different Presets
Feel free to experiment with different Lightroom presets to see what works best for your style. Some presets may look better on certain types of photos than others, so don’t be afraid to try new ones until you find your favorite.
Popular Lightroom Presets for Instagram-Worthy Photos
There are thousands of presets available online, but some popular ones include:
- VSCO presets: Known for their stylish, film-like quality.
- Mastin Labs: These presets mimic the look of classic film photography.
- Samantha’s Lightroom Presets: Great for creating bright and airy images.
- Trendy Presets: Perfect for modern, trendy looks that are perfect for Instagram.
You can explore and find the ones that best fit your style and the vibe of your Instagram feed.
FAQs
1. What are Lightroom presets, and how do they work?
Lightroom presets are pre-set editing configurations that adjust your photos’ color, exposure, contrast, and other elements. They allow you to apply a specific look or style to your images with just one click. You can use them to create Instagram-worthy photos quickly without having to manually edit every photo from scratch.
2. How do I install Lightroom presets?
To install Lightroom presets, first download them from your chosen source. In Lightroom, go to the “Develop” module (desktop) or the “Presets” tab (mobile). Simply click on the “+” icon and choose “Import” to add the downloaded preset. Once installed, you can apply the preset to any photo to achieve the desired effect.
3. Can I modify a preset after applying it to my photo?
Yes! Lightroom presets are fully customizable. After applying a preset, you can fine-tune the exposure, contrast, saturation, and other settings to better fit your photo. This allows you to create Instagram-worthy images that are unique to your style.
4. Are Lightroom presets only for professional photographers?
Not at all! Lightroom presets are for anyone who wants to enhance their photos, whether you’re a beginner or a pro. They make photo editing easy and accessible, helping you create Instagram-worthy photos without needing advanced skills.
5. Where can I find Lightroom presets for Instagram photos?
There are many websites where you can download Lightroom presets, both free and paid. Popular sources include Creative Market, Lightroom’s official website, and independent photographers who sell custom presets. You can find presets for different styles, such as vibrant, vintage, or moody looks, to suit your Instagram feed.
6. How do I choose the right Lightroom preset for my Instagram feed?
When choosing a preset, consider the overall style and mood of your Instagram feed. If your photos are bright and airy, choose a preset that enhances light tones and whites. For a darker, more dramatic vibe, look for presets that focus on deep shadows and rich colors. Make sure the preset you select matches your aesthetic to help you create Instagram-worthy photos consistently.
You may appreciate these posts!